News Today

« »

Bishop Mar George Punnakottil and Mar Madathikandathil

Caricature made by Ignatious Kalayanthani

T C Mathew,Associate Editor,Deepika

Caricature made by Ignatious Kalayanthani.

Rev. Fr. Joseph Kochuparambil

Caricature made by Ignatious Kalayanthani

Thomas Jacob,Malayala Manorama

Caricature made by Ignatious Kalayanthani

Johny Lukose, news Director, Manorama News

Caricature made by Ignatious Kalayanthani

Ignatious Kalayanthani

Caricature made by Ignatious Kalayanthani

Dr Babu Sebastian, V C , M G University

Caricature made by Ignatious Kalayanthani

Jose Panachippuram, Malayala Manorama

Caricature made by Ignatious Kalayanthani

Ignatious Kalayanthani

Caricature made by Ignatious Kalayanthani

Sunday, July 22, 2012

Widget customization - how to style each widget differently?

 we'll learn how to tweak and style each widget (gadget) differently! Meaning:
► each of your widgets (Labels, Archive, Links, custom widget) can have it's own looks (color, font, borders, images....anything!)
► remember that WIDGET is the same thing as GADGET


There are a few simple steps you'll have to take:

choose which widget you'd like to style, and identify it in Blogger HTML code
add some CSS style in the code that will spice up our widget
► don't lose your marbles (be patient and creative)


Choosing and Identifying

Each widget added in Blogger Layout has a unique ID. We will use this ID to apply some style to our widget. So, our job is to dive into the Blogger HTML code, and locate these ID's. Let's go. From your Dashboard, go to:
LAYOUT ► EDIT HTML ► and scroll all the way to the bottom. Because I choose to style my Sidebar widgets (gadgets), I'll look inside of sidebar-wrapper. In my case, the code looks like this:
<div id='sidebar-wrapper'>
<b:section class='sidebar' id='sidebar' preferred='yes'>
<b:widget id='Label1' locked='false' title='Labels' type='Label'/>
<b:widget id='LinkList1' locked='false' title='Links' type='LinkList'/>
<b:widget id='Image1' locked='false' title='My Picture' type='Image'/>
<b:widget id='BlogArchive2' locked='false' title='Blog Archive' type='BlogArchive'/>
</b:section>
</div>
Ok. You can see the ID's of my widgets:
Label widget ID ► Label1
Links widget ID ► LinkList1
Picture widget ID ► Image1
Archive widget ID ► BlogArchive2

Sometimes, if you have a lot of custom widgets, it's hard to guess it's ID. In this case, just remember that their position is the same as they appear in your Blog frontpage. If the Labels widget is in the 1st place, it will be in the 1st place in the code too..
First step is done. Let's move on.


Styling and tweaking 

Now, the fun part. To style the widget, you'll have to know a bit of CSS. But don't worry, you can get this in minutes. In previous step , we've learned to identify the ID of our widget. Now, we'll use it. Let's start with customizing the Link List widget. From Blogger Dashboard, we'll go to:
LAYOUT ► EDIT HTML ► and locate this part (for easier searching, use CTRL + F, and type "/head"):

]]></b:skin>
</head>
ABOVE this part, you'll place the CSS style for your custom Link List Widget (gadget), so the whole thing will look like this:
#LinkList1 {
background:#FFF4BF;
padding-left:15px;
font:14px Arial;
border-bottom:2px solid #FFE25F;
}


#LinkList1 h2 {
background: url(http://i40.tinypic.com/wummhj.jpg) no-repeat bottom left;
height:35px;
padding-top:10px;
font-size:0px;
}


#LinkList1 a:link {
color:#5F5F5F;
text-decoration:none;
}
#LinkList1 a:visited {
color:#5F5F5F;
text-decoration:none;
}
#LinkList1 a:hover {
color:$titlecolor;
text-decoration:underline;
}


]]></b:skin>
</head>
 
Now to explain a bit:
The part in blue is the style for the specific widget box (in this case Link List). You can change background, font style, position, colors, borders of the widget.
Green part is defining only the HEADING of the widget. In my example, I've placed a picture instead of regular text, and with the "font-size:0px" the original heading is hidden. Pretty cool. This way, you can have different heading for each widget in your Blogger template!
In orange, I've defined how my LINK and HOVER colors will look like. I had to do this because the background of my new widget style was blending with original default link color. Now you know that you can use different colors for your links in every widget!

Here is the complete code with Labels and Picture widget (for my example):
View the code below
#Label1 {
background: #DFF7FF;
padding-left:15px;
font:14px Arial;
border-bottom:2px solid #45B7DF;
}

#Label1 h2 {
background: url(http://i40.tinypic.com/12644z4.jpg) no-repeat bottom left;
height:35px;
padding-top:10px;
margin-bottom:5px;
font-size:0px;
}

#LinkList1 {
background:#FFF4BF;
padding-left:15px;
font:14px Arial;
border-bottom:2px solid #FFE25F;
}

#LinkList1 h2 {
background: url(http://i40.tinypic.com/wummhj.jpg) no-repeat bottom left;
height:35px;
padding-top:10px;
font-size:0px;
}

#LinkList1 a:link {
color:#5F5F5F;
text-decoration:none;
}
#LinkList1 a:visited {
color:#5F5F5F;
text-decoration:none;
}
#LinkList1 a:hover {
color:$titlecolor;
text-decoration:underline;
}

#Image1 {
background:#FFDFFE;
padding-left:15px;
font:14px Arial;
border-bottom:2px solid #FFAFFD;
}

#Image1 h2 {
background: url(http://i44.tinypic.com/qywqog.jpg) no-repeat bottom left;
height:35px;
padding-top:10px;
font-size:0px;
}

#Image1 img {
border-width:0px;
padding-left:25px;
}

]]></b:skin>
</head>


Ok, I think you've got it. Remember, this was just an example. You can do a lot more. The only important thing is to remember that you have to IDENTIFY your widget, and STYLE it through your Blogger code.

courtesy:  http://www.blogbulk.com

Saturday, July 14, 2012

കമ്പ്യൂട്ടര്‍ ക്വിസ്,


1. Which of the following are the major components in a computer


  • a) CPU, CD_Rom, Mouse, Keyboard


  • b) Memory, Video card, Monitor

  • c) Modem, Printer, Screen

  • d) CPU, Memory, System bus, Input H/w, Output H/w


2. How the information is transformed from one component to another component in a system?


  • a) System bus

  • b) Memory

  • c) Keyboard

  • d) Monitor


3. MS-Access, MS-Foxpro is the examples of what type of software?


  • a) Spread Sheet


  • b) Presentation Software

  • c) Database Management

  • d) None of the above


4. Windows operating system have


  • a) Graphical User Interface


  • b) Command based Interface

  • c) Both a and b

  • d) None of the above


5. ___ Allows more data to be stored on a disk?


  • a) Data Compression


  • b) Disk Defragmentation

  • c) Both a and b

  • d) None of the above


6. A text-based language with codes or tags used for developing web pages is called?


  • a) Java


  • b) HTML

  • c) Both a and b

  • d) None of the above


7. CASE stands for?


  • a) Computer Aided Software Engineering


  • b) Common Aided Software Engineering

  • c) Computer Access Software Engineering

  • d) Computer Aided Software Engine


8. The primary job of the information system is?


  • a) Data collection

  • b)Data transfer

  • c) Transform inputs to information

  • d) None of the above


9. ___ Is the software that allows the computer to interact with users and hardware?


  • a) System Software


  • b) Application software

  • c) Development software

  • d) None of the above


10. This type of boot occurs when the computer is already on, and you restart it without turning off the power?


  • a) Generic boot

  • b) Live boot

  • c) Warm boot

  • d) Cold boot


Saturday, July 7, 2012

Three Columns Template (I)

The popular templates – Minima, Rounders, Denim, Dots, Scribe and Sand Dollar. Here give you a step by step guide to insert a third column into the templates.


If you are not sure what your template is, under Template -> Edit HTML, look for the “Blogger Template Style” Name. If it says “Thisaway”, you can follow this guide to customize your template.

For other templates, please refer to our articles and guides on:-
1. Three Columns Denim Template;
2. Three Columns Dots Template;
3. Three Columns Minima Template;
4. Three Columns Rounders Template;
5. Three Columns Rounders 2 Template;
6. Three Columns Rounders 3 Template;
7. Three Columns Rounders 4 Template;
8. Three Columns Sand Dollar Template;
9. Three Columns Scribe Template.

Note: Some sites offer free three-column templates for download. If you are starting a new blog, you may look up these sites and use their templates. However, if you have an existing blog and merely want to expand the template to include another column, our guides would be helpful. What we do is to take the standard Blogger templates and show you how to add a new sidebar. This approach gives you total control over the changes, and if you have bookmarked this page, you can revisit it in future should you want to reverse the changes. It is also a safer method, since there could be a few out there who may introduce malicious scripts or blog virus into their customized templates without you knowing.


Before you begin to do anything, remember to backup your template. Go to Template -> Edit HTML. Click the “Download Full Template” link to save a copy of your template.


Thisaway Template


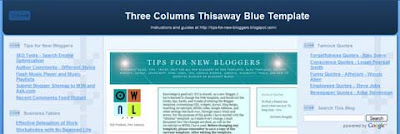
The final three-column Thisaway template should look like this:-


Three Columns Thisaway Template (I)


After you have backed up the current template, scroll to these lines in the template code:-


/* global
-------------- */
body {
margin: 0;
text-align: center;
min-width: 760px;
background: #ce8b43 url(http://www.blogblog.com/thisaway/bg_body.gif) repeat-x left top;
color: $textColor;
font-size: small;
}

blockquote {
margin: 0;
padding: 0 10px 0 10px;
border-left: 6px solid #f7e8d8;
border-right: 6px solid #f7e8d8;
color: $postTitleColor;
}

code {
color: $postTitleColor;
}

hr {
display: none;
}

/* layout
-------------- */
#outer-wrapper {
margin: 0 auto;
width: 760px;
text-align: left;
font: $bodyFont;
}

#header-wrapper {
padding-bottom: 15px;
background: url(http://www.blogblog.com/thisaway/bg_header_bottom.gif) no-repeat left bottom;
}

#header {
background: #634320 url(http://www.blogblog.com/thisaway/bg_header.gif) repeat-x left bottom;
}

#content-wrapper {
position: relative;
width: 760px;
background: #f7f0e9 url(http://www.blogblog.com/thisaway/bg_main_wrapper.gif) repeat-y left top;
}

#main-wrapper {
display: inline; /* fixes a strange ie margin bug */
float: left;
margin: 0 0 0 3px;
padding: 0;
width: 483px;
word-wrap: break-word; /* fix for long text breaking sidebar float in IE */
overflow: hidden; /* fix for long non-text content breaking IE sidebar float */
}

#main {
padding: 22px 8px 0 8px;
background: url(http://www.blogblog.com/thisaway/bg_content.gif) repeat-x left top;
}

.post {
margin: 0 8px 14px 21px;
padding: 0;
border-bottom: 3px solid #f7e8d8;
}

#comments {
margin: 0 16px 14px 29px;
padding: 10px;
border: 1px solid #f0e0ce;
background-color: #f5ede4;
}

#sidebar-wrapper {
display: inline; /* fixes a strange ie margin bug */
float: right;
margin: 0 3px 0 0;
width: 269px;
color: $textColor;
line-height: 1.4em;
font-size: 90%;
background: url(http://www.blogblog.com/thisaway/bg_sidebar.gif) repeat-x left top;
word-wrap: break-word; /* fix for long text breaking sidebar float in IE */
overflow: hidden; /* fix for long non-text content breaking IE sidebar float */
}

#sidebar {
padding: 7px 11px 0 14px;
background: url(http://www.blogblog.com/thisaway/bg_sidebar_arrow.gif) repeat-y 179px 0;
}

#sidebar .widget {
margin-bottom: 20px;
}

#footer-wrapper {
padding-top: 15px;
background: url(http://www.blogblog.com/thisaway/bg_footer_top.gif) no-repeat left top;
clear: both;
}

#footer {
background: #493015 url(http://www.blogblog.com/thisaway/bg_footer.gif) repeat-x left top;
text-align: center;
min-height: 2em;
}


Change, amend or insert the portions (shown in red):-


/* global
-------------- */
body {
margin: 0;
text-align: center;
min-width: 987px;
background: #ce8b43 url(http://www.blogblog.com/thisaway/bg_body.gif) repeat-x left top;
color: $textColor;
font-size: small;
}

blockquote {
margin: 0;
padding: 0 10px 0 10px;
border-left: 6px solid #f7e8d8;
border-right: 6px solid #f7e8d8;
color: $postTitleColor;
}

code {
color: $postTitleColor;
}

hr {
display: none;
}

/* layout
-------------- */
#outer-wrapper {
margin: 0 auto;
width: 987px;
text-align: left;
font: $bodyFont;
}

#header-wrapper {
padding-bottom: 15px;
background: url(http://i191.photobucket.com/albums/z76/tipsfornewbloggers/ty/bg_header_bottom_2.gif) no-repeat left bottom;
}

#header {
background: #634320 url(http://i191.photobucket.com/albums/z76/tipsfornewbloggers/ty/bg_header_2.gif) repeat-x left bottom;
}

#content-wrapper {
position: relative;
width: 987px;
background: #f7f0e9 url(http://i191.photobucket.com/albums/z76/tipsfornewbloggers/ty/bg_main_wrapper_2.gif) repeat-y left top;
}

#main-wrapper {
display: inline; /* fixes a strange ie margin bug */
float: left;
margin: 0 0 0 3px;
padding: 0;
width: 483px;
word-wrap: break-word; /* fix for long text breaking sidebar float in IE */
overflow: hidden; /* fix for long non-text content breaking IE sidebar float */
}

#main {
padding: 22px 8px 0 8px;
background: url(http://www.blogblog.com/thisaway/bg_content.gif) repeat-x left top;
}

.post {
margin: 0 8px 14px 21px;
padding: 0;
border-bottom: 3px solid #f7e8d8;
}

#comments {
margin: 0 16px 14px 29px;
padding: 10px;
border: 1px solid #f0e0ce;
background-color: #f5ede4;
}

#sidebar-wrapper {
display: inline; /* fixes a strange ie margin bug */
float: right;
margin: 0 3px 0 0;
width: 247px;
color: $textColor;
line-height: 1.4em;
font-size: 90%;
background: url(http://www.blogblog.com/thisaway/bg_sidebar.gif) repeat-x left top;
word-wrap: break-word; /* fix for long text breaking sidebar float in IE */
overflow: hidden; /* fix for long non-text content breaking IE sidebar float */
}

#sidebar {
padding: 7px 11px 0 14px;
background: url(http://www.blogblog.com/thisaway/bg_sidebar_arrow.gif) repeat-y 159px 0;
}

#sidebar .widget {
margin-bottom: 20px;
}

#newsidebar-wrapper {
display: inline; /* fixes a strange ie margin bug */
float: left;
margin: 0 0 0 3px;
width: 247px;
color: $textColor;
line-height: 1.4em;
font-size: 90%;
background: url(http://www.blogblog.com/thisaway/bg_sidebar.gif) repeat-x left top;
word-wrap: break-word; /* fix for long text breaking sidebar float in IE */
overflow: hidden; /* fix for long non-text content breaking IE sidebar float */
}

#newsidebar {
padding: 7px 11px 0 14px;
background: url(http://www.blogblog.com/thisaway/bg_sidebar_arrow.gif) repeat-y 159px 0;
}

#newsidebar .widget {
margin-bottom: 20px;
}

#footer-wrapper {
padding-top: 15px;
background: url(http://i191.photobucket.com/albums/z76/tipsfornewbloggers/ty/bg_footer_top_2.gif) no-repeat left top;
clear: both;
}

#footer {
background: #493015 url(http://i191.photobucket.com/albums/z76/tipsfornewbloggers/ty/bg_footer_2.gif) repeat-x left top;
text-align: center;
min-height: 2em;
}


We have done up new background images to accommodate the new widths. The widths of the sidebars are slightly reduced.

Scroll down to these lines:-


/** Page structure tweaks for layout editor wireframe */

body#layout #main,
body#layout #sidebar {
padding: 0;
}


Change them to this:-


/** Page structure tweaks for layout editor wireframe */

body#layout #main,
body#layout #sidebar,
body#layout #newsidebar {
padding: 0;
}


Further down the template, look for this and add the lines (shown in red):-


<div id='newsidebar-wrapper'>
<b:section class='sidebar' id='newsidebar' preferred='yes'>
<b:widget id='NewProfile' locked='false' title='About Me' type='Profile'/>
</b:section>
</div>

<div id='main-wrapper'>
<b:section class='main' id='main' showaddelement='no'>
<b:widget id='Blog1' locked='true' title='Blog Posts' type='Blog'/>
</b:section>
</div>


This places your Profile in the left sidebar. This can be removed later. Now, “Preview” the template to view the changes and if see the new sidebar nicely aligned, click “Save Template”. Remove the Profile if you don't want it there by going back to Template -> Page Elements and removing the Profile widget. Refresh your Blog to see your new Three Column Thisaway layout!

Thisaway Blue Template


The final three-column Thisaway Blue Template should look like this:-


Three Columns Thisaway Template (I)


After you have backed up the current template, scroll to these lines in the template code:-


/* global
-------------- */
body {
margin: 0;
text-align: center;
min-width: 760px;
background: #4386ce url(http://www.blogblog.com/thisaway_blue/bg_body.gif) repeat-x left top;
color: $textColor;
font-size: small;
}

blockquote {
margin: 0;
padding: 0 10px 0 10px;
border-left: 6px solid #d8e7f78;
border-right: 6px solid #d8e7f7;
color: $postTitleColor;
}

code {
color: $postTitleColor;
}

hr {
display: none;
}

/* layout
-------------- */
#outer-wrapper {
margin: 0 auto;
width: 760px;
text-align: left;
font: $bodyFont;
}

#header-wrapper {
padding-bottom: 15px;
background: url(http://www.blogblog.com/thisaway_blue/bg_header_bottom.gif) no-repeat left bottom;
}

#header {
background: #204063 url(http://www.blogblog.com/thisaway_blue/bg_header.gif) repeat-x left bottom;
}

#content-wrapper {
position: relative;
width: 760px;
background: #f7f0e9 url(http://www.blogblog.com/thisaway_blue/bg_main_wrapper.gif) repeat-y left top;
}

#main-wrapper {
display: inline; /* fixes a strange ie margin bug */
float: left;
margin: 0 0 0 3px;
padding: 0;
width: 483px;
word-wrap: break-word; /* fix for long text breaking sidebar float in IE */
overflow: hidden; /* fix for long non-text content breaking IE sidebar float */
}

#main {
padding: 22px 8px 0 8px;
background: url(http://www.blogblog.com/thisaway_blue/bg_content.gif) repeat-x left top;
}

.post {
margin: 0 8px 14px 21px;
padding: 0;
border-bottom: 3px solid #d8e7f7;
}

#comments {
margin: 0 16px 14px 29px;
padding: 10px;
border: 1px solid #cedef0;
background-color: #e4ecf5;
}

#sidebar-wrapper {
display: inline; /* fixes a strange ie margin bug */
float: right;
margin: 0 3px 0 0;
width: 269px;
color: $textColor;
line-height: 1.4em;
font-size: 90%;
background: url(http://www.blogblog.com/thisaway_blue/bg_sidebar.gif) repeat-x left top;
word-wrap: break-word; /* fix for long text breaking sidebar float in IE */
overflow: hidden; /* fix for long non-text content breaking IE sidebar float */
}

#sidebar {
padding: 7px 11px 0 14px;
background: url(http://www.blogblog.com/thisaway_blue/bg_sidebar_arrow.gif) repeat-y 179px 0;
}

#sidebar .widget {
margin-bottom: 20px;
}

#footer-wrapper {
padding-top: 15px;
background: url(http://www.blogblog.com/thisaway_blue/bg_footer_top.gif) no-repeat left top;
clear: both;
}

#footer {
background: #152e49 url(http://www.blogblog.com/thisaway_blue/bg_footer.gif) repeat-x left top;
text-align: center;
min-height: 2em;
}

Change, amend or insert the portions (shown in red):-


/* global
-------------- */
body {
margin: 0;
text-align: center;
min-width: 987px;
background: #4386ce url(http://www.blogblog.com/thisaway_blue/bg_body.gif) repeat-x left top;
color: $textColor;
font-size: small;
}

blockquote {
margin: 0;
padding: 0 10px 0 10px;
border-left: 6px solid #d8e7f78;
border-right: 6px solid #d8e7f7;
color: $postTitleColor;
}

code {
color: $postTitleColor;
}

hr {
display: none;
}

/* layout
-------------- */
#outer-wrapper {
margin: 0 auto;
width: 987px;
text-align: left;
font: $bodyFont;
}

#header-wrapper {
padding-bottom: 15px;
background: url(http://i191.photobucket.com/albums/z76/tipsfornewbloggers/tyb/bg_header_bottom_2.gif) no-repeat left bottom;
}

#header {
background: #204063 url(http://www.blogblog.com/thisaway_blue/bg_header.gif) repeat-x left bottom;
}

#content-wrapper {
position: relative;
width: 987px;
background: #f7f0e9 url(http://i191.photobucket.com/albums/z76/tipsfornewbloggers/tyb/bg_main_wrapper_2.gif) repeat-y left top;
}

#main-wrapper {
display: inline; /* fixes a strange ie margin bug */
float: left;
margin: 0 0 0 3px;
padding: 0;
width: 483px;
word-wrap: break-word; /* fix for long text breaking sidebar float in IE */
overflow: hidden; /* fix for long non-text content breaking IE sidebar float */
}

#main {
padding: 22px 8px 0 8px;
background: url(http://www.blogblog.com/thisaway_blue/bg_content.gif) repeat-x left top;
}

.post {
margin: 0 8px 14px 21px;
padding: 0;
border-bottom: 3px solid #d8e7f7;
}

#comments {
margin: 0 16px 14px 29px;
padding: 10px;
border: 1px solid #cedef0;
background-color: #e4ecf5;
}

#sidebar-wrapper {
display: inline; /* fixes a strange ie margin bug */
float: right;
margin: 0 3px 0 0;
width: 247px;
color: $textColor;
line-height: 1.4em;
font-size: 90%;
background: url(http://www.blogblog.com/thisaway_blue/bg_sidebar.gif) repeat-x left top;
word-wrap: break-word; /* fix for long text breaking sidebar float in IE */
overflow: hidden; /* fix for long non-text content breaking IE sidebar float */
}

#sidebar {
padding: 7px 11px 0 14px;
background: url(http://www.blogblog.com/thisaway_blue/bg_sidebar_arrow.gif) repeat-y 159px 0;
}

#sidebar .widget {
margin-bottom: 20px;
}

#newsidebar-wrapper {
display: inline; /* fixes a strange ie margin bug */
float: left;
margin: 0 0 0 3px;
width: 247px;
color: $textColor;
line-height: 1.4em;
font-size: 90%;
background: url(http://www.blogblog.com/thisaway_blue/bg_sidebar.gif) repeat-x left top;
word-wrap: break-word; /* fix for long text breaking sidebar float in IE */
overflow: hidden; /* fix for long non-text content breaking IE sidebar float */
}

#newsidebar {
padding: 7px 11px 0 14px;
background: url(http://www.blogblog.com/thisaway_blue/bg_sidebar_arrow.gif) repeat-y 159px 0;
}

#newsidebar .widget {
margin-bottom: 20px;
}

#footer-wrapper {
padding-top: 15px;
background: url(http://i191.photobucket.com/albums/z76/tipsfornewbloggers/tyb/bg_footer_top_2.gif) no-repeat left top;
clear: both;
}

#footer {
background: #152e49 url(http://www.blogblog.com/thisaway_blue/bg_footer.gif) repeat-x left top;
text-align: center;
min-height: 2em;
}


We have done up new background images to accommodate the new widths. The widths of the sidebars are slightly reduced.

Scroll down to these lines:-


/** Page structure tweaks for layout editor wireframe */

body#layout #main,
body#layout #sidebar {
padding: 0;
}


Change them to this:-


/** Page structure tweaks for layout editor wireframe */

body#layout #main,
body#layout #sidebar,
body#layout #newsidebar {
padding: 0;
}


Further down the template, look for this and add the lines (shown in red):-


<div id='newsidebar-wrapper'>
<b:section class='sidebar' id='newsidebar' preferred='yes'>
<b:widget id='NewProfile' locked='false' title='About Me' type='Profile'/>
</b:section>
</div>

<div id='main-wrapper'>
<b:section class='main' id='main' showaddelement='no'>
<b:widget id='Blog1' locked='true' title='Blog Posts' type='Blog'/>
</b:section>
</div>


This places your Profile in the left sidebar. This can be removed later. Now, “Preview” the template to view the changes and if see the new sidebar nicely aligned, click “Save Template”. Remove the Profile if you don't want it there by going back to Template -> Page Elements and removing the Profile widget. Refresh your Blog to see your new Three Column Thisaway Blue layout!

Align Header Title and Description


The Header title and description in the Thisaway and Thisaway Blue templates are aligned to the left. To adjust them to the center or a fixed position in the Header, read the guidelines at Header Image and Title Alignment (II).


This article continues at Three Columns Thisaway Template (II). If you want to insert a second sidebar into the Thisaway Green or Thisaway Rose templates, follow our tutorials there.


© Tips for New Bloggers

Tuesday, July 3, 2012

How to display widgets only on home page of blogger


It mean widget display only on homepage and hide from post,static and archive page.Simply enclose the code inside HTML/JavaScript widget between these lines,

<b:if cond='data:blog.url == data:blog.homepageUrl'>

WIDGET CODE GOES HERE

</b:if>

where WIDGET CODE GOES HERE is the code of the widget you want to show or hide.

2.How to display widgets only on post pages of blogger

It mean widget display only on post pages and hide from homepage,static and archive page.Simply enclose the code inside HTML/JavaScript widget between these lines,

<b:if cond='data:blog.pageType == "item"'>

WIDGET CODE GOES HERE

</b:if>

3.How to display widgets only on static pages of blogger.

It mean widget display only on static pages and hide from homepage,post and archive pages.Simply enclose the code inside HTML/JavaScript widget between these lines,

<b:if cond='data:blog.pageType == "static_page"'>

WIDGET CODE GOES HERE

</b:if>

4.How to display widgets on post pages and static pages of blogger.

It mean widget display on post pages & static pages and hide from homepage.Simply enclose the code inside HTML/JavaScript widget between these lines,

<b:if cond='data:blog.pageType != &quot;index&quot;'>

WIDGET CODE GOES HERE

</b:if>

5.How to display widgets on home page and static pages of blogger.

It mean widget display on static pages & home page and hide from post pages.Simply enclose the code inside HTML/JavaScript widget between these lines,

<b:if cond='data:blog.pageType != &quot;item&quot;'>

WIDGET CODE GOES HERE

</b:if>

6.How to display widgets in home page and posts pages of blogger.

It mean widget display on home page and posts pages and hide from static pages.Simply enclose the code inside HTML/JavaScript widget between these lines,

<b:if cond='data:blog.pageType != &quot;static_page&quot;'>

WIDGET CODE GOES HERE

</b:if>

7.How to display widgets only on archive pages of blogger.

It mean widget display on archive pages and hide from any other pages.Simply enclose the code inside HTML/JavaScript widget between these lines,

<b:if cond='data:blog.pageType == &quot;archive&quot;'>

WIDGET CODE GOES HERE

</b:if>


8.How to display widgets only on a specific page of blogger.

It mean widget display on specific page and hide from any other pages.Simply enclose the code inside HTML/JavaScript widget between these lines,

<b:if cond='data:blog.url == &quot;Your_URL_Here&quot;'>

WIDGET CODE GOES HERE

</b:if>

9.How to display widgets except any one specific page of blogger.

It mean widget display on all page without selected specific page.Simply enclose the code inside HTML/JavaScript widget between these lines,

<b:if cond='data:blog.url != &quot;Your_URL_Here&quot;'>

WIDGET CODE GOES HERE

</b:if>

  • In the 8th case put your page url instead of Your_URL_Here,at which you want to display gadget and in the 9th case you have to put your page url at which you don't display gadget.

How To Control Blogger’s Official Widgets?

The same procedure can be applied to Blogger’s official widgets like About Me, Archives, Poll etc. For controlling that widgets do this,

1.Go To Blogger > Design > Edit HTML
2.Backup your template
3.Check the Expand Widgets Templates Box
4.Search for the title of the widget you want to control
5.The code for the widget will look something similar to this one,

<b:widget id='HTML' locked='false' title='WIDGET-TITLE-HERE' type='Profile'>
<b:includable id='main'>

LARGE PART OF WIDGET CODE

</b:includable>
</b:widget>

To explore the title in place of WIDGET-TITLE-HERE you will find two similar codes like those I have shown in bolded green You just need to add the Controlling codes in the following manner.For example if you wish to show a widget at post pages only then do this see below,

<b:widget id="HTML" locked="false" title="WIDGET-TITLE-HERE" type="Profile">
<b:includable id="main">
<b:if cond='data:blog.pageType == &quot;item&quot;'>
LARGE CHUNK OF WIDGET CODE
</b:includable> 
</b:widget>

How to Show blogger widget on homepage only?

Some questions that are most asked are : How to Show blogger widget on homepage only? How can I show widgets only on sub pages? How can I hide widgets on Static pages? How to show widgets on selected pages in blogger? To answer all these questions today's tutorial will be a delicious one. Its really important to control widget Display in Blogger. some widgets are meant for homepage only while some makes sense when you show it at your Contact Pages, About Me pages or static pages. So how do we actually do this. The trick is really simple. You just need to enclose your widgets in few pieces of codes. So lets jump straight on how to manage widgets on different pages in blogger.
Its often the HTML/JavaScript widget that is widely used for adding your customized widgets to Blogger and its mostly this widget that needs to be easily managed. Since you often paste some widget code inside HTML/JavaScript widgets so the only extra thing that you need to do in order to control widget’s display is to enclose that code between two pieces of code as shown in each control codes below,

How to Show Widgets Only On Homepages?

Simply enclose the code inside HTML/JavaScript widget between these lines,
<b:if cond='data:blog.url == data:blog.homepageUrl'>
WIDGET CODE GOES HERE
</b:if>
where WIDGET CODE GOES HERE is the code of the widget you want to show or hide.

How to Hide Widgets On Homepages?

Same procedure here,
<b:if cond='data:blog.pageType == "item"'>
WIDGET CODE GOES HERE
</b:if>

How To Show Widgets Only On Static Pages?

<b:if cond='data:blog.pageType == "static_page"'>
WIDGET CODE GOES HERE
</b:if>

How To Hide Widgets On Static Pages?

<b:if cond='data:blog.pageType != "static_page"'>
WIDGET CODE GOES HERE
</b:if>

How To Show a Widget On a Selected Post Only?

<b:if cond='data:blog.url == "URL OF Selected Post"'>
WIDGET CODE GOES HERE
</b:if>

How To Hide a Widget On a Selected Post?

<b:if cond='data:blog.url != "URL OF Selected Post"'>
WIDGET CODE GOES HERE
</b:if>

How To Control Blogger’s Official Widgets?

The same procedure can be applied to Blogger’s official widgets like About Me, Archives, Poll etc. For controlling that widgets do this,
  1. Go To Blogger > Design > Edit HTML
  2. Backup your template
  3. Check the Expand Widgets Templates Box
  4. Search for the title of the widget you want to control
  5. The code for the widget will look something similar to this one,
<b:widget id='HTML' locked='false' title='WIDGET-TITLE-HERE' type='Profile'>
<b:includable id='main'>
LARGE CHUNK OF WIDGET CODE
</b:includable> </b:widget>
On finding the title in place of WIDGET-TITLE-HERE you will find two similar codes like those I have shown in bolded blue  You just need to add the Controlling codes in the following manner. For example if you wish to show a widget at Homepage only then do this,
<b:widget id='HTML' locked='false' title='WIDGET-TITLE-HERE' type='Profile'>
<b:includable id='main'>
<b:if cond='data:blog.url == data:blog.homepageUrl'>
LARGE CHUNK OF WIDGET CODE
</b:if>
</b:includable> </b:widget>
That’s it. Do the same for applying any controlling code.

How To Controll Widgets in blogger ?


This is the Procedure applied to Blogger’s official widgets like About Me, Archives, Poll etc. For controlling that widgets do this,
  1. Go To Blogger >> Design (or) Template(for new interface) >> Edit HTML
  2. Backup your template
  3. Check the Expand Widgets Templates Box
  4. Search for the title of the widget you want to control
  5. The code for the widget will look something similar to this one,
<b:widget id='HTML' locked='false' title='WIDGET-TITLE-HERE' type='Profile'>
<b:includable id='main'>
WIDGET CODE GOES HERE
</b:includable> </b:widget>
On finding the title in place of WIDGET-TITLE-HERE you will find two similar codes like those I have shown in blueYou just need to add the Controlling codes in the following manner. For example if you wish to show a widget at Homepage only then do this,
<b:widget id='HTML' locked='false' title='WIDGET-TITLE-HERE' type='Profile'>
<b:includable id='main'>
<b:if cond='data:blog.url == data:blog.homepageUrl'>
WIDGET CODE GOES HERE
</b:if>
</b:includable> </b:widget>
where WIDGET CODE GOES HERE is the code of the widget you want to show or hide.


How to Hide Widgets On Homepages?

The same procedure can be applied to hide widget on homepage.
<b:if cond='data:blog.pageType == "item"'>
WIDGET CODE GOES HERE
</b:if>

How To Show Widgets Only On Static Pages?

<b:if cond='data:blog.pageType == "static_page"'>
WIDGET CODE GOES HERE
</b:if>

How To Hide Widgets On Static Pages?

<b:if cond='data:blog.pageType != "static_page"'>
WIDGET CODE GOES HERE
</b:if>

How To Show a Widget On a Selected Post Only?

<b:if cond='data:blog.url == "URL OF Selected Post"'>
WIDGET CODE GOES HERE
</b:if>

How To Hide a Widget On a Selected Post?

<b:if cond='data:blog.url != "URL OF Selected Post"'>
WIDGET CODE GOES HERE
</b:if>

That’s it. Do the same for applying any controlling code.

20 Useful CSS Tips for blogging

In the old days, we depend a lot of on developers and programmers to help update the website, even when it’s just a minor one. Thanks to the CSS and it’s flexibility, styles can be extract independently away from the codes. Now, with some basic understanding of CSS, even a novice can easily change the style of a website.
Whether you are interested in picking up CSS to create your own website, or merely to tweak your blog’s look and feel a little – it’s always good to start with the fundamentals to gain a stronger foundation. Let’s take a look at some CSS Tips we thought might be useful for beginners. Full list after jump.

  1. Use reset.css

    When it comes to rendering CSS styles, browsers like Firefox and Internet Explorer have different ways of handling them. reset.css resets all fundamental styles, so you starts with a real blank new stylesheets.
    Here are few commonly used reset.css frameworks – Yahoo Reset CSS, Eric Meyer’s CSS Reset, Tripoli
  2. Use Shorthand CSS

    Shorthand CSS gives you a shorter way of writing your CSS codes, and most important of all – it makes the code clearner and easier to understand.
    Instead of creating CSS like this
    .header {
          background-color: #fff;
          background-image: url(image.gif);
          background-repeat: no-repeat;
          background-position: top left; 
        }
    It can be short-handed into the following:
    .header {
          background: #fff url(image.gif) no-repeat top left
        }
    MoreIntroduction to CSS Shorthand, Useful CSS shorthand properties
  3. Understanding Class and ID

    These two selectors often confuse beginners. In CSS, class is represented by a dot "." while id is a hash ‘#". In a nutshell id is used on style that is unique and don’t repeat itself, class on the other side, can be re-use.
    MoreClass vs. ID | When to use Class, ID | Applying Class and ID together
  4. Power of <li>

    <li> a.k.a link list, is very useful when they are use correctly with <ol> or <ul>, particulary to style a navigation menu.
    MoreTaming Lists, Amazing LI
  5. Forget <table>, try <div>

    One of the greatest advantage of CSS is the use of <div> to achieve total flexibility in terms of styling. <div> are unlike <table>, where contents are ‘locked’ within a <td>‘s cell. It’s safe to say most <table> layouts are achievable with the use of <div> and proper styling, well maybe except massive tabular contents.
    MoreTables are dead, Tables Vs. CSS, CSS vs tables
  6. CSS Debugging Tools

    It’s always good to get instant preview of the layout while tweaking the CSS, it helps understanding and debugging CSS styles better. Here are some free CSS debugging tools you can install on your browser: FireFox Web Developer, DOM Inspector, Internet Explorer Developer Toolbar, and Firebug.
    firebug 20 Useful CSS Tips For Beginners
  7. Avoid Superfluous Selectors

    Sometimes your CSS declaration can be simpler, meaning if you find yourself coding the following:
    • ul li { ... }
    • ol li { ... }
    • table tr td { ... }
    They can be shorten down to just
    • li { ... }
    • td { ... }
    Explanation: <li> will only exist within <ul> or <ol> and <td> will only be inside <tr> and <table> so there’s really not necessary to re-insert them.
  8. Knowing !important

    Any style marked with !important will be taken into use regardlessly if there’s a overwriting rule below it.
    .page { background-color:blue !important; background-color:red;}
    In the example above, background-color:blue will be adapted because it’s marked with !important, even when there’s a background-color:red; below it. !important is used in situation where you want to force a style without something overwriting it, however it may not work in Internet Explorer.
  9. Replace Text with Image

    This is commonly practice to replace <h1>title</h1> from a text based title to an image. Here’s how you do it.
    h1 {
    text-indent:-9999px;
    background:url("title.jpg") no-repeat;
    width:100px;
    height:50px;
    }
    Explanation: text-indent:-9999px; throws your text title off screen, replaced by an image declared by background: {...} with a fixed width and height.
  10. Understand CSS Positioning

    The following article gives you a clear understanding in using CSS positioning – position: {...}
    MoreLearn CSS Positioning in Ten Steps
  11. CSS @import vs <link>

    There are 2 ways to call an external CSS file – respectively using @import and <link>. If you are uncertain which method to use, here’s few articles to help you decide.
    MoreDifference Between @import and link
  12. Designing Forms in CSS

    Web forms can be easily design and customize with CSS. These following articles show you how:
    MoreTable-less form, Form Garden, Styling even more form controls
    select 20 Useful CSS Tips For Beginners
  13. Get Inspired

    If you are looking around for nicely designed CSS-based website for inspiration, or just simply browsing to find some good UI, here are some CSS showcase site we recommend:
    css showcase 20 Useful CSS Tips For Beginners
    Need more? Here’s a round up of 74 CSS Galleries.
  14. Rounded Corners in CSS

    This following article gives you an idea how to create cross-browser compatible rounded borders with CSS.
    rounded borders 20 Useful CSS Tips For Beginners
  15. Keep CSS Codes Clean

    If your CSS codes are messy, you are going to end up coding in confusion and having a hard time refereing the previous code. For starters, you can create proper indentation, comment them properly.
    More12 Principles For Keeping Your Code Clean, Format CSS Codes Online
  16. Typography Measurement: px vs em

    Having problem choosing when to use measurement unit px or em? These following articles might give you a better understanding on the typography units.
    MoreUnits of Measurement in CSS, CSS Font size explained, Using Points, Pixels, Ems, or Percentages for CSS Fonts
  17. CSS Browsers Compatibility Table

    We all know each browser has different ways of rendering CSS styles. It’s good to have a reference, a chart or a list that shows the entire CSS compatibility for each browser.
    CSS support table: #1, #2, #3, #4.
    csstable 20 Useful CSS Tips For Beginners
  18. Design Multicolumns in CSS

    Having problem getting the left, middle and right column to align properly? Here are some articles that might help:
    multicolumns 20 Useful CSS Tips For Beginners
  19. Get a Free CSS Editors

    Dedicated editors are always better than a notepad. Here are some we recommend:
    More – Simple CSS, Notepad ++, A Style CSS Editor
    notepadplus 20 Useful CSS Tips For Beginners
  20. Understanding Media Types

    There are few media types when you declare CSS with <link>. print, projection and screen are few of the commonly used types. Understanding and using them in proper ways allow better user accessibility. The following article explains how to deal with CSS Media types.
    MoreCSS and Media Types, W3 Media Types, CSS Media Types, CSS2 Media Types